Thursday, January 31, 2013

Bow-Tie Pasta

Today, we will be focusing on a very common Italian dish, usually eaten in different Italian grills. But, after today's recipe, you won't have to go to restaurants to get what you want. And, so, we will make bow-tie pasta, a creative delicious dish!!!!!
Food Facts: Many people go to restaurants, which may not serve healthy or fresh food, like pasta. They can either be frozen made, or can be inserted with a lot of unhealthy ingredients. Other people may get the store-bought, frozen pasta, which contain a lot of cheese, that is not good for your body. This is why we will make homemade pasta!! Let's get started!!!!!!!!!!

What You'll Need
  • One quarter of bow-tie or regular pasta (per person)
  • One cup pasta sauce ( I recommend Ragu's Sauteed Onion and Garlic Sauce, or any other type you would like)
  • One tablespoon of Canola oil
  • 2-3 chopped cloves of garlic
  • One chopped onion
  • 2-3 chopped basil leaves
  • 7-9 cups of water
Steps You'll Need To Take
  1. First, take 7-9 cups of water, keep it in a pot, and add a little salt, to get taste.
  2. Then, boil the water over the stove, once it boils, add the pasta then let it cook. Then, take the pasta and keep it in a strainer, wait until it dries.
  3. Third, then in a wok and the measured oil, the chopped garlic, and then chopped onion, or any other vegetable you like, take that and stir fry for 3 minuted. 
  4. Fourth, add the pasta sauce in the mix and fry the puree for one minute.
  5. Fifth, once the pasta sauce warms up, add the pasta into the sauce, and mix, properly, until all ingredients are mixed thoroughly.
  6. Sixth, keep the pasta on the stove for 2-3 more minutes, and if you want add a little cheese on the pasta.
Pasta is a great, healthy meal for the entire family to enjoy. It's a quick and easy thing to make, so hopefully you liked the recipe!!!
See you next week!!!

Wednesday, January 23, 2013

Potato Stir Fry

Today's recipe is an incredible Indian dish. It is called potato stir fry, it is delicious,  this certain recipe is very healthy, including various Indian herbs. The spices give good taste to the potato. 
Food Facts: This dish is full of healthy ingredients and is very yummy when it's homemade. Other vegetable stir fries are very hard to make. This one is very easy to make and does not require much time in making this. Store bought meals are usually frozen, which make them unhealthy. This is why we are making potato stir fry! Let's start!!!!

What You'll Need
  • One boiled potato (per person)
  • Two tablespoons of canola oil
  • 1/2 teaspoon of mustard seeds
  • 1/2 teaspoon of cumin 
  • 4 to 5 curry leaves
  • One pinch of asafoetida powder
  • One tablespoon of chili powder (as per your taste)
  • 1/2 teaspoon of turmeric 
  • Salt (as per your taste
  • One teaspoon of cumin powder
   Steps You'll Need To Take
Ready- Made Potato Stir Fry
  1. First, peel the boiled potatoes, and then cut them into square pieces.
  2. Then, pour the measured oil into a non-stick pan and heat it to a high temperature on the stove and put the cumin seeds and mustard seeds into the oil as it heats. When it crackles, be sure you won't burn yourself, since it can sputter out of the pan.
  3. Third, add asafoetida powder to the mixture, and add the chopped potatoes.
  4. Fourth, add the chili powder, cumin, curry leaves, salt, and turmeric.
  5. Fifth, stir the potatoes for 5-10 minutes, and your Indian dish is ready!!!!
You can eat potato stir fry with bread, or Indian roti (which I recommend.) And I hope you enjoyed this recipe!!!!
Tell me what you think, answer in the comment box, below!!!!!
See you next week!!!!!!!!!!!!!!!!!!!!

Thursday, January 17, 2013

Chocolate Cake

Everybody in the family loves cake, especially when it is homemade, and has a fantastic filling!
Food Facts: Homemade cake is always yummy, when you follow the steps the right way. Store-bought cake always contains too much sugar and cream, making it unhealthy and on top of that, the amount of cream put onto one cake makes the cake inedible. Everybody loves homemade cake, and it is more enjoyable when it is made the perfect way! So follow these steps!!

What You'll Need For The Cake
  • 1 ¾ cups of all- purpose flour
  • One teaspoon of baking soda
  • 2/4 teaspoon of fine salt
  • ¾ cup of Dutch-process cocoa powder (other types of chocolate powder are fine, too)
  • cup of boiling water
  • cup of whole milk (room temperature)
  • Twelve tablespoons of unsalted butter
  • Two cups of granulated sugar (other types of sugar is fine)
  • Two teaspoons of vanilla essence
  • Three large eggs (white eggs)
MATERIALS FOR THE FILLING
  • One cup of heavy cream
  • Hershey’s Syrup
  • One- two teaspoons of sugar (as per your taste)

Making yummy cake like this also needs caution, like when you are placing the cake inside the oven, be careful that your bare hand does not the metal part of the oven. (Which will be extremely hot.) Also when you are mixing the ingredients, be sure to mix them without spilling anything, that can cause a sticky mess. Another caution is to work on a flat surface, so no materials are knocked over.

Steps For The Chocolate Cake

  1. 1. First, preheat the oven to a temperature of 350 degrees fahrenheit.

  1. 2. Second, whisk the all-purpose flour, salt, and baking soda together in a large bowl.Mix until the materials are purified.

  1. 3. Third, in another bowl, whisk together the cocoa powder, milk, and boiling water, then keep it aside.

  1. 4. Fourth, place the measured butter in a large bowl of a stand mixer fitted with a paddle attachment and beat the butter on a medium-high speed.(for safety) Keep mixing the butter until it’s fluffy and light in color. While you are mixing the butter, also add the granulated sugar and the vanilla essence.

  1. 5. Fifth, add a half of your flour mixture into the stand mixer and stir the mix until it’s all incorporated. Then do the same for the cocoa mix. Add a half of the cocoa mix and stir that until everything is purified. Continue doing this with the rest of the cocoa and flour mix.

  1. 6. Sixth, once you have prepared the batter, take an oven bowl, apply flour to its sides- it does not get sticky after baking it. Pour the batter in the bowl and keep the plate in the preheated oven. Bake for 30 minutes.

  1. 7. After baking, make sure that the inside is also dry. To make sure, insert a toothpick in the cake. If the result is slightly crummy, your cake is ready! ( If not, bake for 5-10 more minutes.)

  1. 8.  Once it’s done, let the cake cool for 20 minutes. Then, cut the cake out of the plate and let it cool for 30-45 minutes. Meanwhile, make the chocolate filling.

STEPS FOR THE FILLING


1. First, take the heavy cream keep the measured amount in the stand mixer. Mix for 3-6 minutes, until it’s thick and creamy.
2. When you are mixing, add the amount of Hershey’s Syrup you need and the sugar you need. Make sure all the materials are properly mixed, in order to taste yummy.
3. Keep mixing, and you should have a chocolaty whipped cream.
4. Next, carefully cut half of the cake off the top, and carefully, place it in a safe place. Keep some of the whipped cream on cut area, and place the top of the cake back on the cream.
If you have cream still remaining, you can make a little design on your cake, for an important occasion, by, putting the cream in a plastic bag, sealing it, cutting the corner of the bag and making any design on the cake, you want!!
5. Fifth, gently place the cake in the refrigerator and eat it cold or warm!

6. ENJOY THIS CAKE!
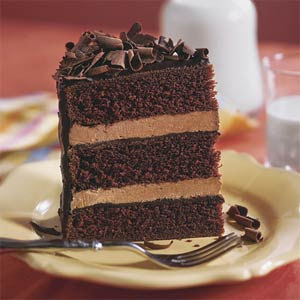
Chocolate Cake with Chocolate Shredding
Chocolate cake is a great dessert for a party or any other occasion - especially one that has a tasty filling. The filling for this cake can vary. Strawberry, vanilla, coffee, you can even keep ice-cream if you like! You can also keep whatever topping you like, like in this image, you can apply chocolate shredding.
What did you think of this recipe?
answer in the comment box below
see you all next week!
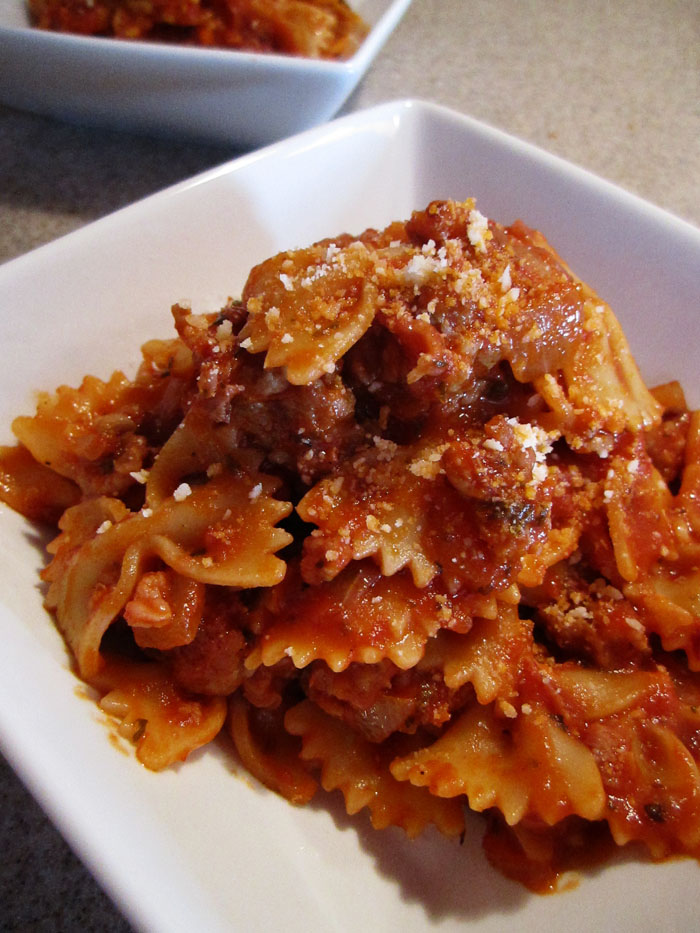
Wednesday, January 9, 2013

Quesadillas

Happy New Year's everyone!!! 
To start off the new year, we will be making a delicious, Mexican food, QUESADILLAS!!! Quesadillas are a thin pocket of beans, rice, and other meats and vegetables.
Food Facts: Store bought quesadillas usually contain a lot of cheese which is not very healthy and also is frozen, which means it is not that fresh, making it unhealthy. And quesadillas may not be the kind you want in restaurants, so this is why we will be making a home-made style quesadilla!! Your own type, style and topping!
LET'S GET STARTED!
What You'll Need

  • One block of cheese ( mozzarella or american cheese)
  • One tortilla (per person)
  • Black beans (ready made)
  • Long grain rice (ready made)
  • Green onions
  • Green Peppers
  • Jalapenos
  • One - three tablespoons of canola oil 
  • Non- stick pan
  • Griddle
  Steps You'll Need To Take

  1. First, grate the block of cheese and set aside.
  2. Second, heat up the non stick pan and keep one-two tablespoons of canola oil in the pan and let it broil.
  3. Third, cut the vegetables and starting cooking them.
  4. Fourth, add the vegetables onions and the green peppers into the pan and cook it until it sizzles and it's golden brown. While it's cooking add salt, (keep the amount as per your taste) and mix.
  5. Then, when the vegetables are ready, let them cool and apply the cooking spray on the griddle, then heat the griddle and keep your tortilla on the pan and warm the tortilla until it is golden.
  6. Next, take your beans and heat it up in a pot over the stove for two minutes. Do the same with the rice.
  7. Seventh, once your vegetables, beans, and rice are ready starting stuffing your tortilla.
First you can put the amount of cheese you want, then keep the vegetables you want on the cheese. Then, add the rice and beans as the last layer and close the pocket and eat warm!

Quesadillas

You can eat quesadillas with different types of dips, like as shown in the picture to the left. With a side of mild salsa, guacamole, or sour cream.


I hope you enjoy eating this delicious, healthy, homemade, Mexican meal. How did you like this recipe? How did this taste? What dips did you choose? Answer in the comment box below! 
See you next week!